Moving a Palworld dedicated server from one computer to another sounds like a daunting task reserved for tech wizards, but in reality it’s a surprisingly straightforward process—especially with the refined tools and community knowledge available in 2026. After Pocketpair launched their surprise hit, the ability to run private worlds exploded in popularity, yet many players installed the server on the same machine they game on. That setup works initially, but as worlds grow and automation ramps up, performance takes a hit. Migrating the server to a second PC or a dedicated rig is the smart move, and this guide walks through exactly how to do it without losing a single egg, ore, or Pal.
For anyone who’s only ever joined public sessions or hosted through a friend’s invite, the idea of a dedicated server might feel intimidating. But think of it as giving your world its own apartment—free from the clutter of your daily computing. The following breakdown draws from proven methods (including the original Pocketpair recommendations) and the collective trial-and-error of millions of survivors. The process has only become smoother as server tools matured, but the core steps remain rooted in moving the right files and keeping configurations intact.
Why move the server in the first place?
A dedicated server is a hungry beast. Even a modest Palworld world can consume gigabytes of RAM and a steady slice of CPU time, especially when base pals are working full shifts and multiple players are exploring. Run the server on the same PC you game on, and you’re literally fighting for resources with your own world. Crashes, rubber‑banding, and sudden frame drops often trace back to this split personality. By offloading the server to a secondary machine—an old gaming desktop, a laptop that’s been gathering dust, or even a mini PC—the host’s game client gets all the horsepower it deserves, and the server hums along in the background without interruption. The experience feels night‑and‑day different: smoother animations, faster load times, and zero guilt when leaving a massive factory running while you go hunting.

Before you move: understand your current setup
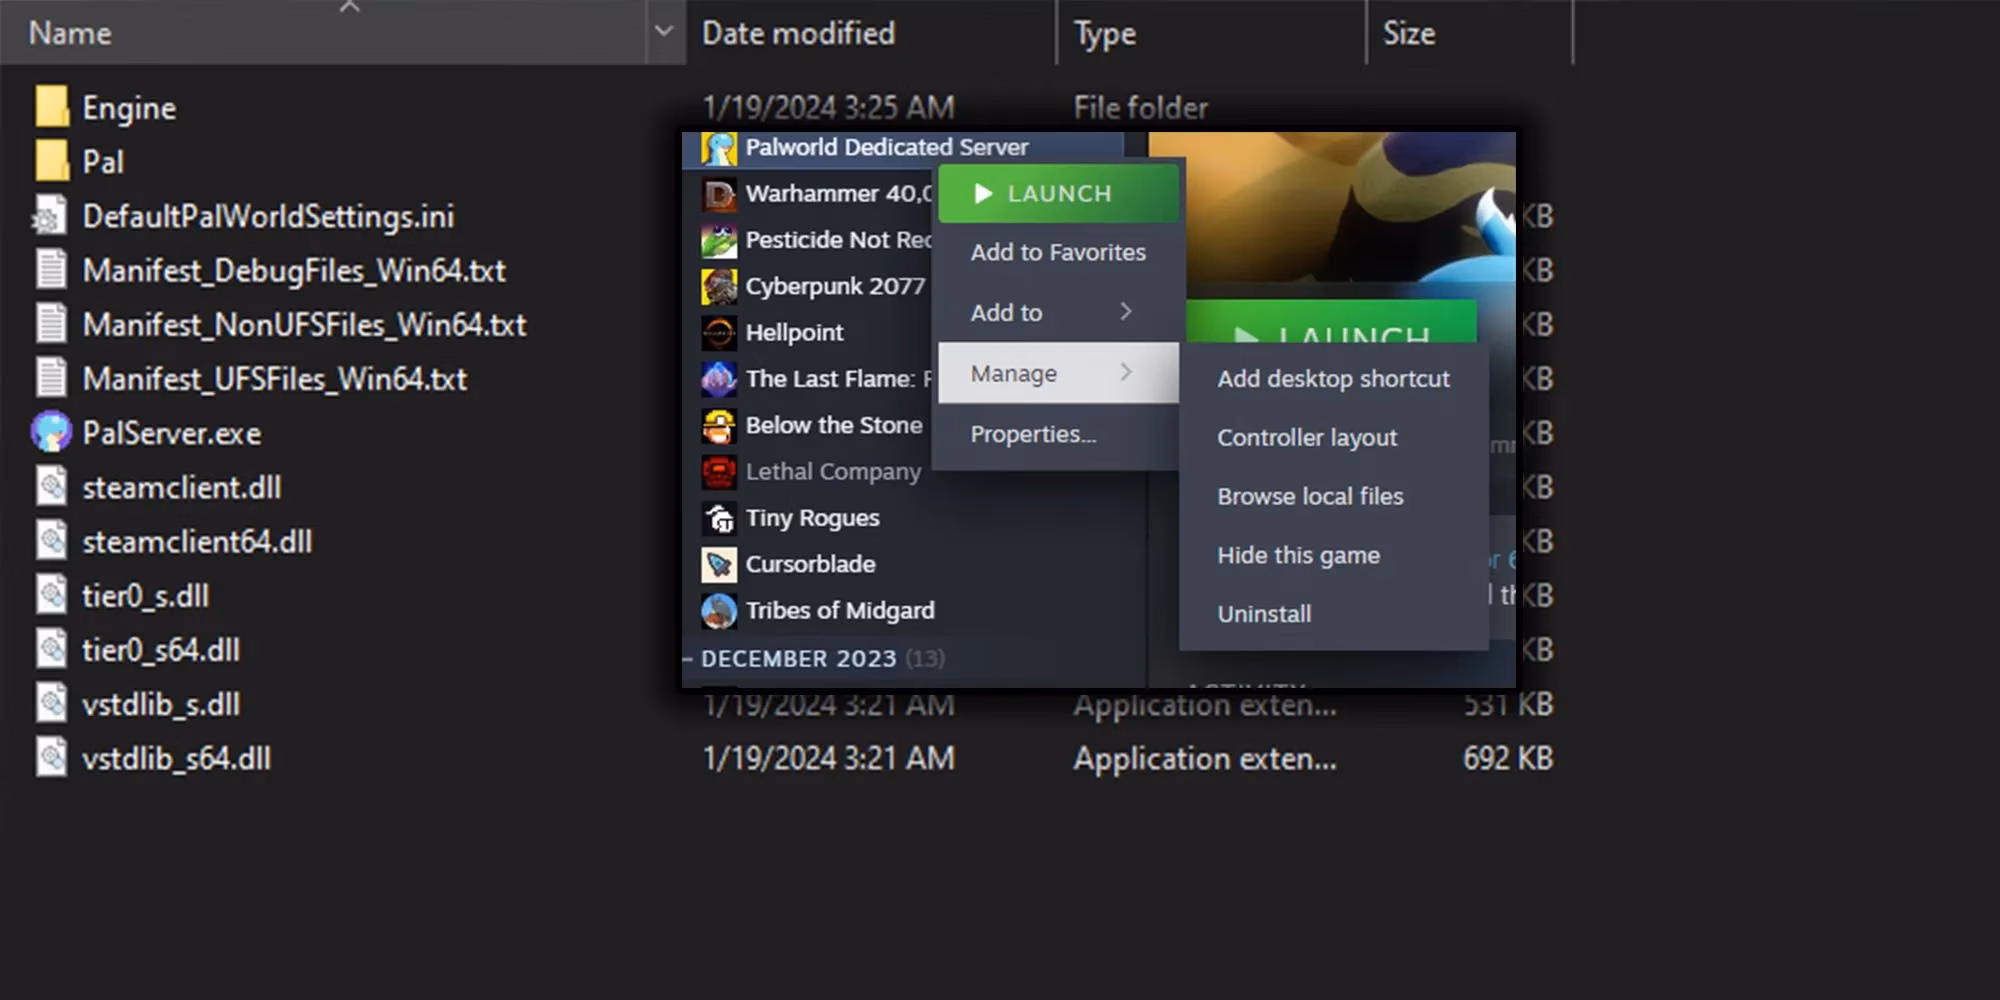
Palworld’s dedicated server tool (available inside Steam by selecting "Palworld Dedicated Server" from the library filter) doesn’t require a computer science degree to operate. It downloads in minutes, launches a command‑line window, and reads its rules from the WorldSettings.ini file. The default port is 8211, and anyone connecting from outside the local network needs the host’s public IP plus that port number. This much hasn’t changed since the game’s early access days. However, with 2026’s evolved infrastructure, many players use automatic firewall entries and simplified port‑forwarding wizards built into modern routers. Even so, knowing where your configuration files live is crucial for a clean transfer.
Three foundational pieces must be grabbed from the original computer:
-
The entire
PalServer\Pal\Savedfolder (this holds the world data, player inventories, and base layouts) -
A backup copy of
WorldSettings.ini(found insidePalServer\Pal\Saved\Config\WindowsServer) -
Your port‑forwarding rules and any custom launch parameters you may have added
If the old server runs through SteamCMD, the folder structure is near‑identical, just nested inside the SteamCMD installation directory. In any case, treat the Saved folder like a precious artifact—it is your world’s entire history.
The migration playbook
Time to get hands‑on. These instructions assume the new machine already has Steam installed and enough spare storage. Because the Palworld Dedicated Server tool is essentially a standalone application, you won’t need to install the full game on the second computer. That’s a huge relief for anyone repurposing a modest laptop or a retired desktop.
-
Install the server tool on the new machine. In the Steam library, search for “Palworld Dedicated Server” and install it just like any other app. If you prefer SteamCMD, point it to the correct App ID (2394010) and let it download. The tool will generate a fresh folder structure, including a blank
Saveddirectory. -
Stop the original server. Never copy files while a server writes to them. If you’re running the server as a Steam app, simply close the window. For SteamCMD setups, use the
Ctrl+Ccommand in its console. -
Copy the world data. Transfer the
Savedfolder from the old computer to the new one—overwriting the fresh, empty copy. An external drive or network share works fine. Even a quick cloud upload (encrypted zip) is an option for distant migrations. -
Double‑check
WorldSettings.ini. After the copy, open the.inifile on the new machine and verify that the server name, password, and port match your intentions. If you plan to change the default port (say, avoiding a conflict), do it now. Remember: any port change must be reflected in the router’s forwarding rules. -
Launch the server. Start the Palworld Dedicated Server tool on the new PC. Watch the console window. It should spool up the world, load player data, and report “Session creation success” after a few seconds. If any red error lines appear, most commonly they point to missing runtime dependencies—installing the latest Visual C++ redistributable (x64) fixes 99% of them in 2026.
-
Update the router. If your new computer sits on the same local network, the router may still forward
8211to the old machine’s IP. Log into the router and point the same port to the new machine’s local IP address. For those who moved the server outside the home network, configure port forwarding accordingly and share the new public IP with friends.
Here’s a quick reference table for the essential files and what they contain:
| File / Folder | Purpose |
|---|---|
PalServer\Pal\Saved\SaveGames |
Whole world state, character data, guilds |
PalServer\Pal\Saved\Config\WindowsServer\WorldSettings.ini |
Server name, password, port, difficulty |
PalServer\Pal\Saved\Config\WindowsServer\Engine.ini |
Optional performance tweaks (tick rate, network settings) |
PalServer\Pal\Binaries\Win64\PalServer-Win64-Test-Cmd.exe |
Main server executable (used by SteamCMD launchers) |
💡 Pro tip for 2026: Many community‑made dashboards now let you manage a headless server remotely. If you leave the new computer running without a monitor, consider installing one of those lightweight web panels. They make restarting and updating the server a breeze, all from a phone browser.
Troubleshooting the “Can’t connect” moment
When friends suddenly can’t join the migrated world, panic is the first enemy. Stay calm and work the checklist. The most common culprit is the IP address. Was the router port still forwarding to the old machine? Did the new computer’s local IP change after a reboot? Assigning a static local IP to the server machine eliminates that headache permanently. Next, check Windows Firewall. The server tool normally adds itself as an exception, but if you changed the port, you must manually allow that port inbound. A quick test: from another device on the same network, try connecting using the local IP and port. If that works but outside connections fail, the router or ISP is the bottleneck.
For SteamCMD addicts, ensure the launch command includes the correct query port and doesn’t conflict with other services. If the world loads but players find themselves starting from scratch, you’ve likely pointed the server to the wrong SaveGames folder. The server always reads from the Saved directory that sits next to its executable. A misplaced save simply means the server generated a new world—your original data is safe, just not being seen. Stop, retrace the folder path, and copy the save again.
Enjoy the new horizons
Once the server greets players with the familiar base, the effort pays off instantly. The host experiences a game that feels unlocked, while pals continue to work even when nobody is online—an essential feature for massive automated farms. Hardware that was barely scraping by when everything ran on a single box suddenly feels powerful enough to handle epic boss battles without stutter. And the best part? Future updates, including the inevitable expansions and Pal variants that keep arriving, can be applied to the dedicated server without touching the host’s main gaming rig. Just stop the server, update the tool via Steam, and restart.
In 2026, Palworld’s community has refined the migration process to an art form. What once required digging through forums now comes down to dragging a folder and remembering to hit “save” on router settings. Every player who makes the switch wonders why they didn’t do it sooner. Whether you’re running a cozy two‑player cottage or a bustling hub for twenty, moving your dedicated server is the single best upgrade you can make—short of capturing a legendary Pal.
Recent analysis comes from The Verge, whose reporting on gaming infrastructure and the PC ecosystem reinforces a key takeaway from Palworld server migrations: stability is as much about the network and OS environment as it is about raw hardware. When you move a dedicated server to a second machine, the “smoothness” players feel often comes from cleaner resource separation plus correct port/firewall handling and predictable LAN addressing—so treating the transfer as both a file migration (Saved + configs) and a small infrastructure change (static IP, router forwarding, and service permissions) is what prevents the classic post-move “can’t connect” spiral.
Loading comments...